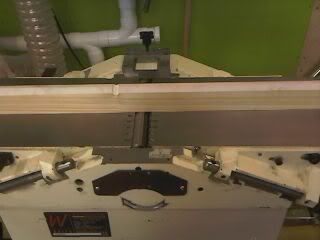
I cut and prepared two lengths of oak 18*50*600mm yours may vary depending on your model planer place the two together place one end flush with the far end of the outfeed table and mark in from both ends of the out-feed table by 50 mm and mark.
Now leave the oak timber in its place with the far end level with the end of the outfeed table turn your cutter block till one blade is at TDC as it just scuffs the oak and marks the third position, this marks is for the position to screw the third magnet forming TDC. Now screw all magnets to there marks, turn them over place the far end level to the end of outfeed table the third magnet is now directly over TDC. your jig is now completed.
Please note above the leading edge of planer blade the centre of the magnet and the scribed line are now lined up. I then made a small curved
wedge to slip in between the cutter roller to lock roller with no movement.
First, turn the roller cutter by hand till one of the blades reaches it
top dead centre and lines up with the scribed line on the framework, this is Indicating (TDC) clearly seen in the left photo.
A. First wind up the in-feed table till it is at zero position on the depth setting scales, then wind up or down the out-feed table using a straight edge till its absolutely level with your in-feed table and lock the out-feed table in that position. Both tables are now at the correct level. Wind down the in-feed table. B place in the curved wedge and wind up the in-feed table till it pinches the wedge tight to stop any rotation making sure the leading edge of the blade is adjacent to the scribed line on the block. Repeat this for the first second and third blade.
Setting in your sharp blades. Place in the first blade with just enough pinch on it so when you place the jig in it position over the blade at TDC the third magnet will push down the blade to it correct height the same as the outfeed table and hold it there for you as you lock the nuts to lock it in it final place, repeat on blade two, and three.
Now wind up your in-feed table to its zero position. Now you have the in-feed table the blades and the out-feed table all set to the exact same height, check it with a straight edge. Now simply set your depth of cut for planing. The blades are now set correctly, now there will be no snipe at either end of your timber when planing
Now turn the jig over and lay in it correct position. When any planer knives have just been reset and you rotate the planers roller by hand when the blade reaches TDC you should just feel the blade scuff the timber ONLY without moving the timber jig forwards, anyone who says differently is wrong, if your timber moves forwards the blades are set to high because the blades have actually lifted the timber very slightly this is what causes snipe on the ends of your timber.
Enjoy.


No comments:
Post a Comment